Separating Ferns: A Refined Guide to Dividing Fern Plants:Ferns constitute an elegant addition to both garden landscapes and container displays. Depending on the species, they flourish under a spectrum of conditions—from deep shade and subdued light to bright yet indirect illumination. Whatever the nuances of your indoor or outdoor environment, there is almost certainly a fern well suited to it.
When adequately hydrated, whether rooted in the ground or confined to a pot, ferns reward the attentive cultivator with luxuriant, arching fronds of striking ornamental value. Yet, as with most plants—particularly those grown in containers—ferns inevitably outgrow their allotted space over time.
Continue reading to explore the principles and practices underlying the successful division of fern plants.
How to Divide Fern Plants
As a general guideline, ferns benefit from repotting or division every three to five years. Should the central portion of the plant begin to decline, accompanied by diminished frond size, it is a strong indication that the fern has exceeded the capacity of its container or planting site.
While transferring the plant to a larger vessel is a viable option, many gardeners favor division as a more efficient and sustainable approach. Encouragingly, ferns are remarkably resilient; unlike many perennials, their robust root systems tolerate substantial handling with minimal stress.
Division of Ferns
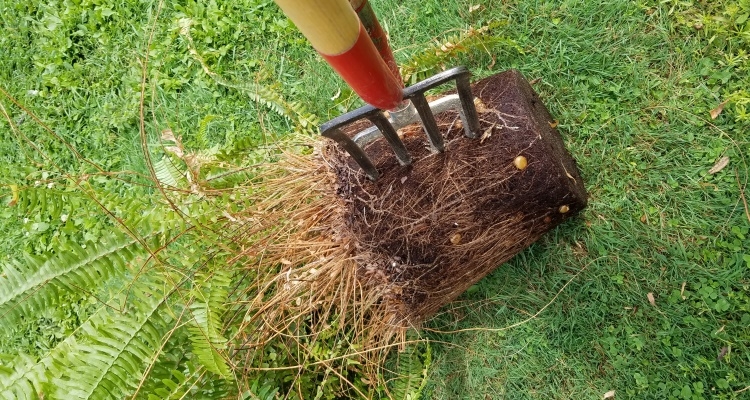
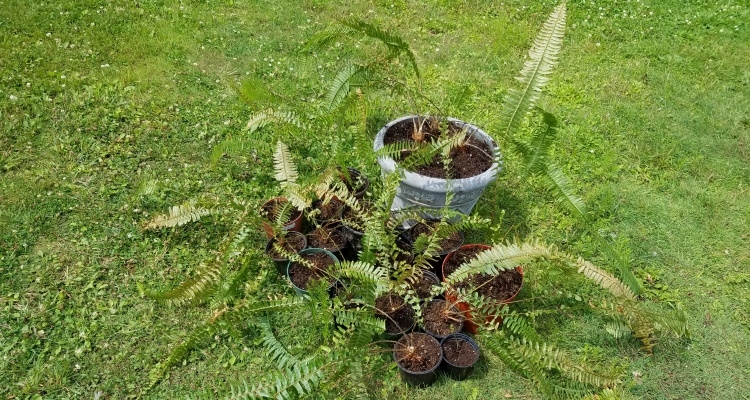
The optimal period for dividing ferns is in early spring, coinciding with the onset of active growth. Begin by carefully removing the plant from its container or lifting the clump from the soil. Gently loosen and remove as much surrounding soil as possible, noting that fern root systems are often dense and intricately interwoven.
Using a long, serrated blade, divide the root mass into halves or quarters. Ensure that each segment retains a viable portion of foliage, maintaining relative balance among the divisions. The roots may prove resistant, requiring deliberate effort to sever; however, such intervention is well tolerated by the plant.
Once separated, transplant each division into a new container or prepared garden site. Employ a soil medium that offers both efficient drainage and moderate moisture retention, ideally enriched with organic matter and a coarse component to enhance structure. Water thoroughly and maintain consistent moisture levels during the establishment phase.
Dividing Large Ferns in Autumn: Propagation for the Coming Year
For those seeking to preserve and propagate ferns that have grown excessively large over the summer months, autumn presents an opportune moment for division. This practice not only safeguards existing plants for the following year but also yields multiple new specimens—without additional cost.
The recurring purchase of ferns each spring can become a considerable expense, particularly when several are required to enliven shaded patios, porches, or decks. By contrast, dividing mature ferns in autumn enables the gardener to generate an abundance of new plants with minimal investment.
Managing Overgrown Ferns
Ferns are inherently vigorous growers. When situated in favorable conditions and provided with consistent moisture, they rapidly attain impressive proportions. Notably, they often thrive even in the absence of supplemental fertilizers, provided their fundamental requirements are met.
Under attentive care, many ferns will outgrow their containers within a single growing season. By late summer or early autumn, both foliage and root systems may become excessively developed, with roots densely compacted within their confined space.
At this stage, some gardeners mistakenly regard the plant as beyond recovery. The prospect of overwintering such a large specimen indoors may appear impractical, and even when foliage is reduced, the congested root system remains a limiting factor.
However, a more effective strategy lies in division. By removing the plant from its container, pruning back excessive growth, and segmenting the root mass into smaller units, one can produce numerous new plants. These divisions are considerably easier to manage and overwinter indoors, and with proper care, they will mature into full, vibrant ferns in the subsequent growing seasons.
Dividing Large Ferns in Autumn
Ferns may, in principle, be divided at any stage throughout the growing season. However, undertaking this process in early autumn affords newly formed roots sufficient time to establish before the plants are brought indoors.
This timing confers two distinct advantages. First, it primes the divisions for vigorous, early growth with the return of spring. Second, it renders the plants far more manageable during the overwintering period.
Indeed, accommodating oversized ferns indoors can be a formidable challenge. By cutting back their luxuriant fronds and partitioning the plants into smaller divisions, one can maintain them with considerably less effort. An added benefit lies in the reduction of seasonal debris, as large, untrimmed ferns tend to shed substantial foliage throughout winter.
A Methodical Approach to Dividing and Replanting Large Ferns
The most demanding aspect of dividing an overgrown fern often lies in managing its abundant foliage. The most effective strategy is therefore to remove the fronds prior to division.
Using a pair of sharp hand shears or hedge trimmers, reduce the fronds to approximately two to three inches above the base. This task is typically most straightforward while the plant remains within its container.
Although such severe pruning may appear injurious, it poses no harm to the plant. Following this process, the fern will assume a stark, woody appearance—an entirely normal and temporary condition.
With the foliage removed, proceed to extract the plant and its root mass from the container. In most cases, it will slide out with ease, as densely root-bound specimens often lose their grip on the pot.
Sectioning the Root Mass
Once removed, invert the fern so that the underside of the root ball is exposed. This orientation provides a clearer view of the root architecture and facilitates more precise, balanced division.
Using a sharp spade or knife, incise the root mass to create divisions. A Hori-Hori garden knife is particularly effective, as its serrated edge allows both slicing and sawing through the dense root ქსtructure.
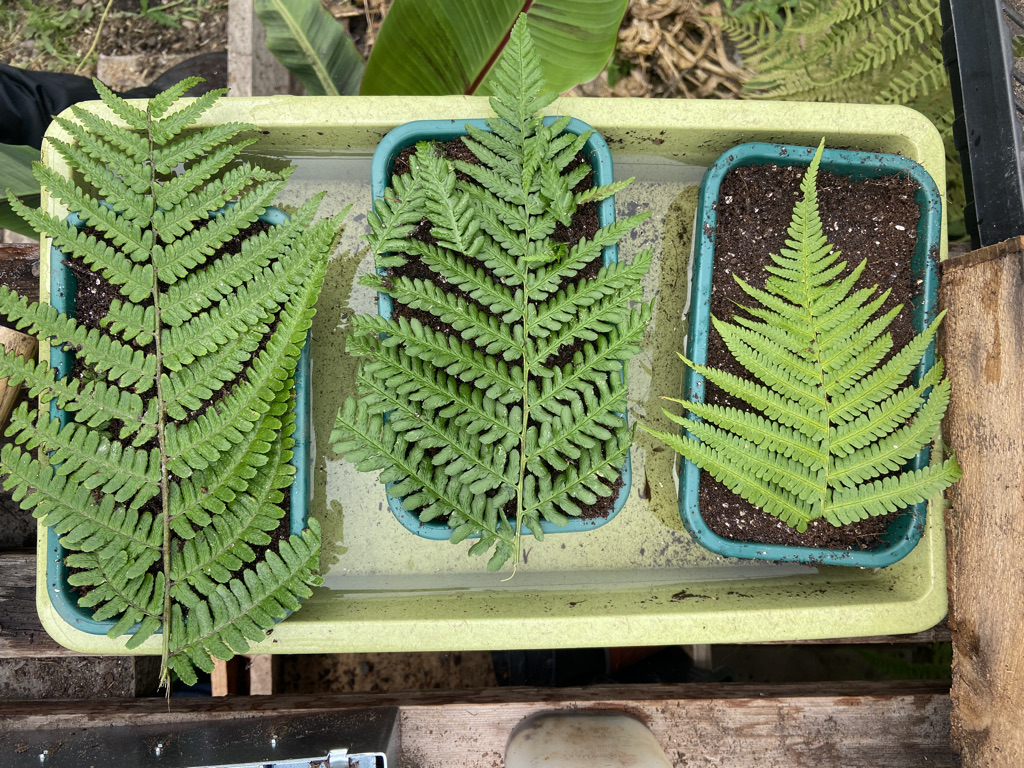
For ferns cultivated in standard 8- to 12-inch containers, the root ball can typically be divided into four equal sections, each capable of developing into a robust plant suitable for a similarly sized or larger container in the following season.
Where larger specimens are desired, halving the root mass is preferable. Conversely, for smaller containers, the divisions may be further subdivided into six or even eight segments, depending on the intended scale of growth.
Transplanting the Divisions
Each division should now be transferred into its own container. Ideally, the new pot should exceed the size of the root ball, but not excessively so.
For optimal establishment, select containers approximately one-third to one-half larger than the root mass. Excessively spacious pots discourage the formation of a cohesive root system, potentially leading to rapid desiccation and suboptimal establishment.
Containers in the range of 12 to 14 inches in diameter are often ideal, providing sufficient volume for one to two seasons of growth without overwhelming the developing plant.
Selecting an Appropriate Growing Medium
A frequent error in fern cultivation is the use of dense garden soil during repotting. Successful transplantation requires a high-quality potting medium that is both light in texture and well-draining.
Begin by placing a layer of potting mix at the base of the container. Position the division centrally, ensuring it sits level, then gradually infill around the root mass with additional medium. Gently firm the soil by hand to eliminate air pockets and secure the plant.
Complete the process by filling the container to the appropriate level, ensuring that the crown of the fern remains flush with the soil surface.
Post-Transplantation Care
One advantage of autumn division is the opportunity to leave newly potted ferns outdoors for a short period, allowing them to acclimate and establish.
Maintain a consistent watering regimen comparable to that used for mature plants. Under typical conditions, new growth should become apparent within two to three weeks, emerging from both the root system and residual tissue.
As temperatures decline, it becomes imperative to shield the plants from frost. At the first indication of freezing conditions, relocate the ferns indoors for overwintering.
Overwintering Considerations
Select a cool, well-ventilated space with indirect light—basements with modest window exposure are particularly suitable.
During winter, irrigation should be markedly reduced. Water only when the growing medium has fully dried, as ferns enter a period of subdued metabolic activity and limited growth.
With the arrival of warmer spring temperatures, gradually reintroduce the plants to outdoor conditions to stimulate renewed growth. Exercise caution during this transition, ensuring protection from late frosts.
In due course, the ferns will expand with remarkable vigor, yielding an abundance of foliage. Perhaps most gratifyingly, this method provides a sustainable means of cultivating numerous plants—entirely without additional expense.
About the Authors
Jim and Mary Competti have devoted more than fifteen years to writing on gardening, do-it-yourself projects, and culinary pursuits from their 46-acre farm in Ohio. They are frequent speakers on horticultural topics and share a passion for travel.
Readers are warmly invited to correspond via email for inquiries, commentary, or general engagement. Subscription to their mailing list and further updates are also available, alongside their presence on social media platforms.
How to Divide a Boston Fern
I would like you to replace the words and sentences with more beautiful, elegant, advanced English words and sentences, keep the meaning the same, but make it more literary and improve the article’s ability to be expressed in the style of Nature magazine.Please only provide a corrected version of the text, and avoid including explanations. Please start by editing the following text:
Boston fern propagation is a great way to enjoy more of the most versatile plants around. They can be grown indoors year-round and outdoors during the warm seasons. They look great in containers whether they’re hanging, sitting on a table, or placed in a garden border. Boston ferns can also be planted directly in the ground and used as a summer annual. Boston ferns pair beautifully with flowering annuals of any color and make a nice focal point in larger mixed combination plantings. With all those possibilities, you’re going to need a lot more plants! And guess what? Propagating Boston ferns is easier than you think!
How do ferns reproduce?
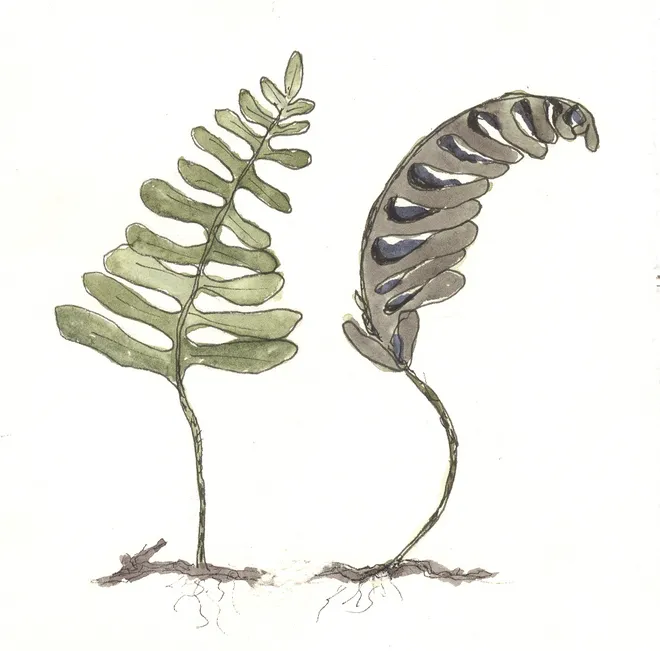
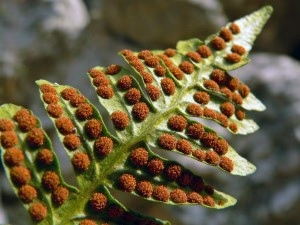
In nature ferns can reproduce by spores that are produced on the undersides of leaves or they can spread by roots, called rhizomes, that grow away from the main plant to set new roots and form new crowns. (The “crown” is the area at the top of the roots, just at the soil line, where the new plant emerges .)
Commercial growers often use tissue culture to clone new plants. Tissue culture is a process where the cells from a single plant can be grown into many more – genetically identical – copies of the original plant. Fortunately, there’s a much simpler way for you to propagate your own fern plants at home; by cutting a plant apart at the roots to create several smaller plants.
Boston fern propagation – Here’s how to divide a Boston fern:
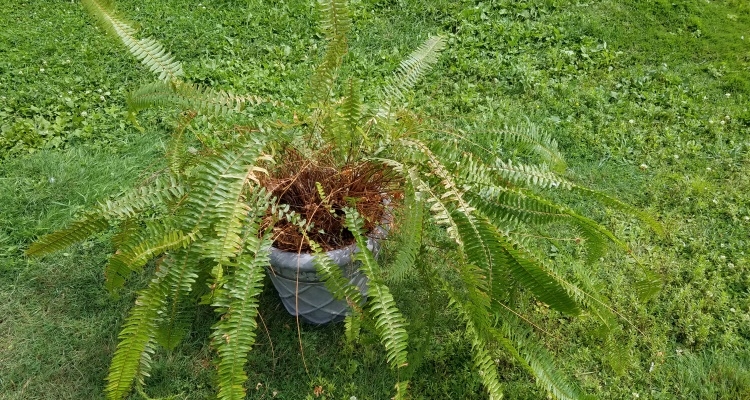

- Start with a large, full Boston fern plant. Take the plant outside to work on it or lay it on paper, a plastic-coated tablecloth or a tarp to capture any mess.
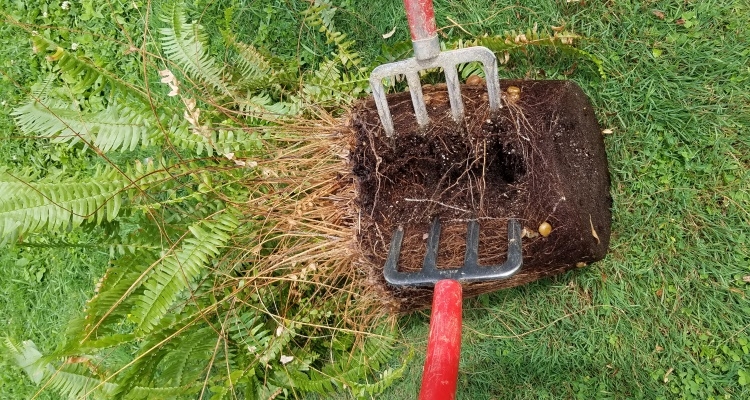
- Remove plant from its pot.
- Using a pair of garden forks, divide the Boston Fern root ball in half. If you don’t have forks, you can carefully slice through the roots with a sharp knife, or even gently tear the roots apart with your hands.
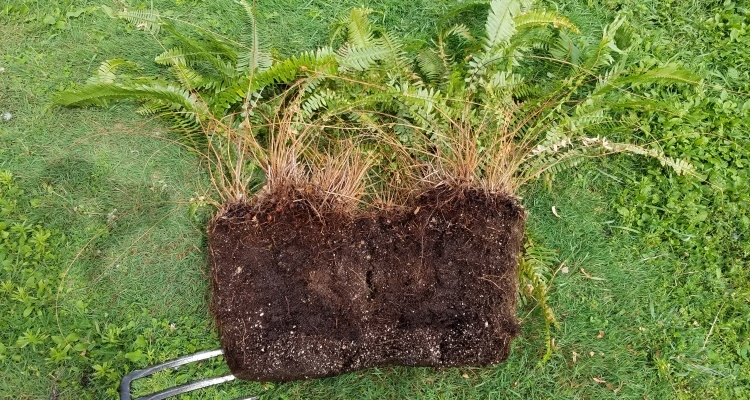
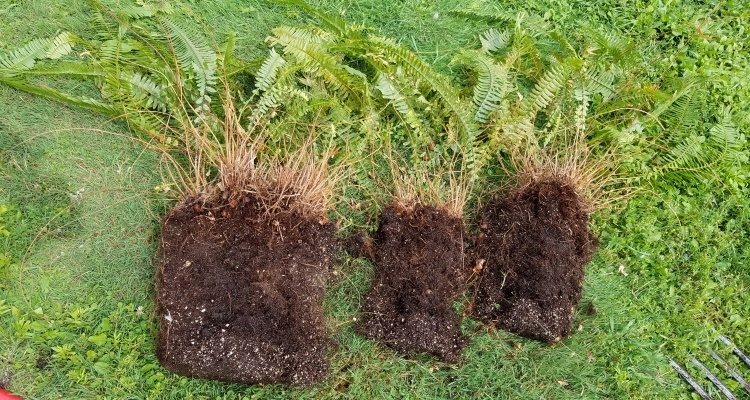
propagate Boston fern divide roots - Divide the fern root ball again into quarters. You can then continue to keep halving the roots into smaller sections as long as each has a healthy root mass with a crown of foliage.
repot and divide boston fern - Repot the plants into individual pots or place several in a larger container. Water them well to settle the soil around the plant roots.
propagate boston fern - Provide the propagated Boston fern plants with bright, indirect sunlight and it won’t be long before they grow into full, lush plants.
Why is it called a Boston fern?
hanging boston fern
People have been growing ferns for their ornamental use since 1793, when sword ferns were introduced to England from Jamaica. Over time the popularity of ferns as indoor plants grew throughout the world.
The Boston fern was discovered in 1894 by a Boston florist, Fred C. Becker, among a routine delivery of sword ferns. What would come to be known as the “Boston fern” was a single mutant plant, found among a shipment of 200 sword ferns. It had the distinction of having gracefully arched fronds – a noteworthy contrast to its parent species’ stiff, vertical fronds. Fred Becker nurtured his new find and propagated more plants. People loved the beautiful, soft look of the Boston fern and it quickly became the most popular fern for growing as a houseplant.