When I envision ferns, I picture luxuriant, verdant cascades of Boston ferns adorning summer porches—either suspended from overhead beams or poised upon pedestals—an enduringly graceful spectacle. I once attempted this arrangement myself. Yet it was only a year ago that I first introduced a fern from the outdoors into an indoor setting. Indeed, my interest in cultivating ferns as houseplants emerged only within the past three years, reaching its apex when I encountered an unusual specimen thriving in my daughter’s apartment: a Bird’s Nest fern.
In this article, I present a comprehensive guide to growing and caring for ferns as indoor houseplants. Although numerous species flourish in outdoor landscapes, the focus here is specifically on their cultivation within interior environments.
Background of Ferns
Ferns represent one of the most ancient lineages of vascular plants, with origins extending back hundreds of millions of years. They are surpassed only by flowering plants in terms of diversity. Unlike angiosperms, ferns do not produce seeds or flowers; instead, they reproduce via spores, typically located on the undersides of their leaves (fronds). These spores often appear as small, dark dots. While spore propagation is possible, most gardeners favor division of the root system, a more practical and reliable method (see the propagation section below).
When selecting a fern, match the plant’s requirements to the conditions in your home. Always inspect specimens carefully prior to purchase, examining both upper and lower leaf surfaces for signs of pests or disease.
Characteristics of Ferns
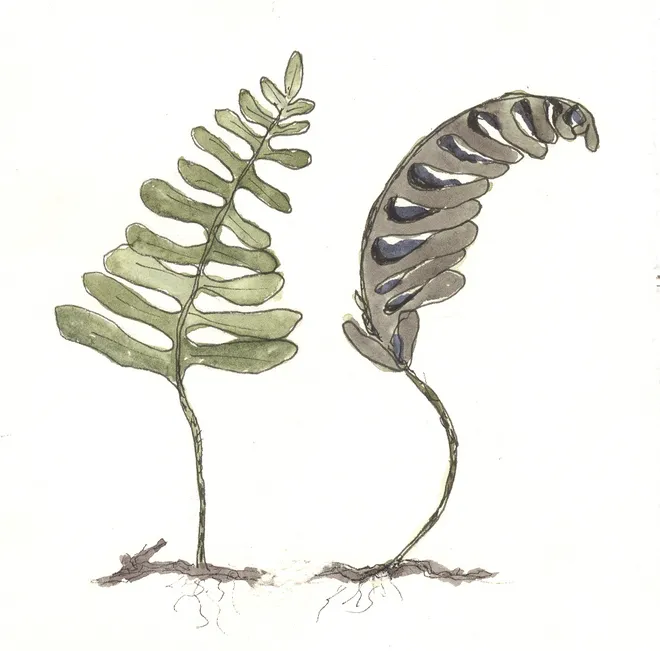
The leaves of ferns are known as fronds. These fronds arise from rhizomes—horizontal underground stems—via a stalk called a stipe. Particularly captivating is the emergence of new fronds: tightly coiled buds forming at the plant’s center, gradually unfurling into mature foliage. Observing this slow, deliberate expansion is a remarkably engaging process.
Caring for Your Fern
This section outlines the principal aspects of fern care: light, soil, watering, fertilization, transplanting, propagation, and common issues.
Light
Although outdoor ferns thrive in shade, indoor specimens prefer moderate, indirect light. Direct sunlight can scorch fronds, causing browning. For south- or west-facing windows, position ferns several feet away. Gentle morning light from an east-facing window is ideal. Ferns generally prefer daytime temperatures between 65°F and 75°F, with nighttime temperatures approximately 10°F cooler.
Soil
Ferns are relatively adaptable regarding soil. A general-purpose indoor potting mix enriched with organic matter, such as peat moss, is suitable. Incorporating 25–30% perlite improves drainage and moisture balance. Upon opening new soil, ensure it is pest-free and emits an earthy aroma. Review the ingredient list on the packaging, as some mixes contain slow-release fertilizers or water-retention crystals—factors that influence watering and fertilization practices.
Water
Container selection directly influences watering. Choose pots with drainage holes and removable saucers. Clay pots dry more rapidly than plastic due to their porous structure. Containers should accommodate the root system with approximately one inch of additional space for growth. As with most houseplants, appropriate watering is essential.
Many ferns require consistent moisture, particularly during active growth. Water when the soil becomes dry. Two practical indicators include: soil lightening in color and pulling away from the pot’s edges, and inserting a finger about two inches into the soil—if it feels dry, watering is needed. Additional considerations include:
Use lukewarm or room-temperature water; rainwater is also suitable. Avoid softened water, as it contains high salt concentrations.
Water during the day to allow foliage to dry before evening.
Water thoroughly, allowing excess to drain into the saucer; discard remaining water after a few minutes.
Reduce watering during periods of slowed growth, typically fall and winter.
Humidity
Most ferns thrive in 40–50% humidity. Methods for increasing humidity include:
Misting the plant regularly. Although concerns exist regarding disease, light misting several times per week is generally safe.
Using a humidifier, beneficial for both plant and household environment.
Double-potting: place the fern in a larger container, filling the gap with moistened sphagnum moss.
Placing the pot on a tray of damp pebbles, ensuring water does not exceed pebble height; clean periodically to prevent algae.
Grouping plants together to create a localized humid microclimate, while maintaining adequate airflow.
Fertilization
Ferns have modest nutritional requirements. Always follow fertilizer instructions. Key considerations:
Fertilizer labels display ratios such as 5-5-5 or 3-2-1, indicating nitrogen, phosphorus, and potassium (N-P-K). A diluted fish emulsion (3-2-1) applied at half strength every three to four weeks during the growing season is effective.
Fertilizers are available in liquid, granular, or slow-release forms.
Reduce or suspend fertilization from late fall through early spring when growth slows.
Newly purchased plants may already contain fertilizer. Consider repotting into your own mix after allowing a week for acclimation. Many commercial mixes already include slow-release nutrients, eliminating the need for additional fertilization.
Transplanting
Because ferns benefit from ample space, repot every one to two years—annually for the first three years, then biennially. Increase container size gradually; for example, move from a 6-inch to an 8-inch pot. Indoor ferns may be transplanted at any time of year.
Steps for transplanting:
Prepare a new container with a gravel base and partially filled moistened soil. Add slow-release fertilizer if absent from the mix.
Water the plant, then gently remove it by inverting the container while supporting the base.
Loosen and remove excess soil from the roots.
Inspect roots and trim any dead sections.
Position the fern in the new container.
Add soil evenly, leaving one inch below the rim, gently firming around the base.
Water thoroughly.
Return the plant to its location; temporary wilting is normal.
Propagation
Ferns are most effectively propagated by root division during transplanting:
Remove the plant from its container.
Use a sharp knife to divide the root ball into halves or quarters.
Separate divisions and pot individually.
Water thoroughly.
Maintain high humidity during the initial weeks through daily misting.
Common Problems
Issues are typically minor and manageable:
Root rot from overwatering; separate and repot healthy sections if necessary.
Brown leaf tips, which may result from insufficient water, excessive fluoride, or high soluble salts; trim affected tips and adjust watering quality.
Scale insects or mealybugs; remove with alcohol-dipped cotton swabs.

Your Guide to Caring for Indoor Ferns
Ferns: Easy elegance for plant lovers.
Ferns are not really difficult to grow in the modern home, but they will not tolerate neglect. The soil must never be allowed to dry out, and the surrounding air needs to be kept moist. Few ferns can tolerate hot dry air, so air humidity has to be artificially increased.
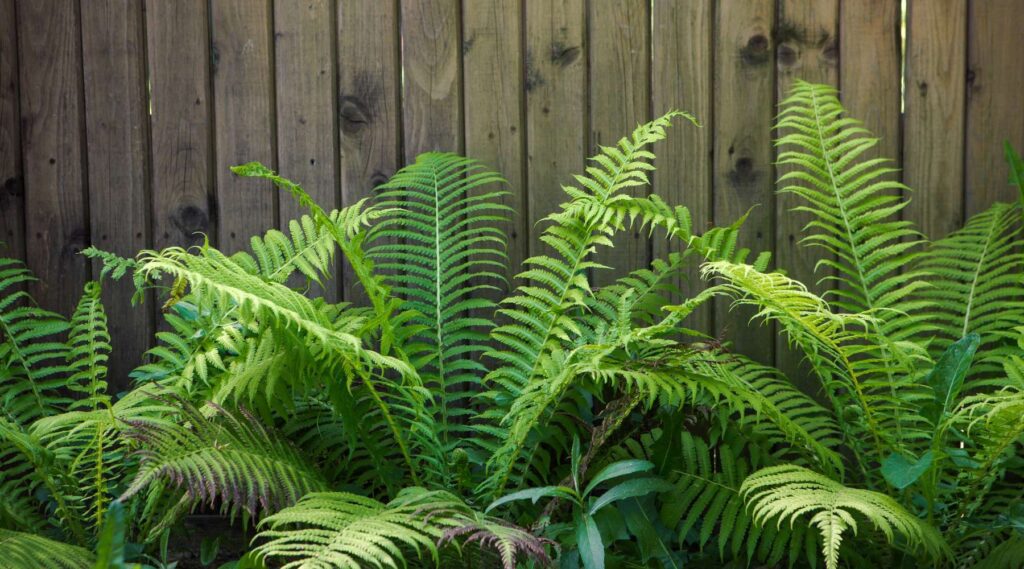
There is a bewildering choice of varieties. Nearly two thousand are suitable to growing indoors, but comparatively few are available commercially. There is also a wide choice of ways to display your collection. Many of them are ideal for a hanging basket and some, such as Boston fern and Bird’s Nest Fern, are large enough and bold enough to be displayed as specimen plants on their own. Delicate ferns, such as Delta Maidenhair, are best planted in a terrarium. When grouping ferns with other plants make sure that they are not crushed – the fronds are fragile and need room to develop. In addition ensure that all dead and damaged fronds are removed so that new ones can grow.
Indoor Ferns like a comfortable temperature, moist soil, and a decent amount of light.
Ferns require average warmth – cool but not cold nights are desirable. The best temperature range is 60°-70°F – the minimum for most types is about 50°F and ferns may suffer at more than 75°F.
Despite popular opinion, ferns are not shade lovers indoors as most varieties originated in the dappled brightness of tropical woodland. Good indirect light is the proper location – an east- or north-facing windowsill is ideal.
Compost must be kept moist at all times and never allowed to dry out for an extended period of time. This does not mean constantly soggy compost – waterlogging will lead to rotting. Reduce watering in winter. Moist air is necessary for nearly all ferns. Mist fronds regularly.
Repotting & Propagating.
Repot in spring when the roots fill the pot – most specimens will probably require annual repotting. Do not bury the crown of the plant.
The simplest way to propagate ferns is to divide the plant into 2 or 3 pieces in early spring if it produces rhizomes. Some ferns produce young plants at the ends of runners or on fronds. It is possible, but not always easy, to raise plants from spores obtained from the underside of mature fronds.
Special problems to look out for:
- Brown dots or lines regularly arranged on underside of fronds are spore cases, an indication that the frond is mature and healthy. The spores produced inside these spore cases can be used for propagation.
- Brown shells irregularly scattered on fronds is caused by scale, the Bird’s Nest Fern is particularly susceptible to this pest.
- Yellowing fronds, beginning at the base of plant or mature fronds develop brown spots and fall is due to the air being too warm-a common complaint when ferns are stood too close to radiators. Few ferns can tolerate very high temperatures. If the plant is also limp and wilting, then the cause is incorrect watering.
- Yellowing fronds, brown tips or no new growth is caused by the air being too dry.
- Pale fronds or scorch marks on surface is caused by too much sunlight. Ferns must be protected from midday sunshine in the summer.
- Pale fronds, weak growth is due to not enough fertilizer. Ferns need feeding, little and often, during the growing season.
- Fronds dying back either old age or the two most likely culprits are dry air and dry compost.