Do Ferns Reproduce by Seeds or Spores?Ferns reproduce via spores, not seeds. Their life cycle encompasses a gametophyte stage, during which gametes—sperm and eggs—are produced. Under favorable conditions, sperm swim towards the eggs, resulting in fertilization and the formation of a new sporophyte. The sporophyte, the familiar leafy part of the fern, then generates spores within structures known as sporangia. These spores are dispersed, and upon germination, they grow into new gametophytes, thus perpetuating the cycle.
Ferns belong to an ancient group of plants that predate flowering species. They do not produce flowers or seeds, but instead, they rely on spores for reproduction. These spores, resembling fine dust, are formed within capsules called sori on the undersides of the fern fronds.
Are Ferns Seeds?
Let us begin with a brief quiz:
TRUE or FALSE? Spores are the seeds of ferns. Just as a pea gives rise to a seedling, which matures into a full-sized pea plant, a spore develops into a young fern that grows into a full-sized fern, akin to its parents.
The answer is…
FALSE! A spore germinates to produce a prothallus, which can grow to a full size of about 1–2 cm across within a few months.
Perhaps some readers are taken aback. Many might have known the correct answer or deduced it simply by elimination, while others may find themselves, as I was just last month, puzzling over the fern life cycle—”the bugbear of many introductory botany students” (Moran 2004). Such confusion is unfortunate, as uninviting diagrams and complex terminology should not overshadow the fascinating story of fern reproduction.
Earlier, I shared that I am part of a group of botanists revising Vascular Plants of South Dakota by Theodore Van Bruggen. Currently, I find myself engrossed in the world of pteridophytes—ferns and their relatives—making me a pteridologist, or at least an aspiring one.
In the fern section of the university library, I encountered A Natural History of Ferns by Robbin Moran of the New York Botanical Garden. His engaging fusion of scientific insight and narrative has made my own fern explorations far more enjoyable. For instance, the fern life cycle now seems clear. The revelation came when I discovered a key fact: fern spores, unlike seeds, do NOT develop into miniature versions of their parents upon germination.

Perhaps you recall, albeit vaguely, that a typical fern experiences two life stages… two independent, free-living plants. The well-known leafy fern plant is the sporophyte, which produces spores. These spores develop in minute structures called sporangia, which form clusters on the undersides of the fern fronds.
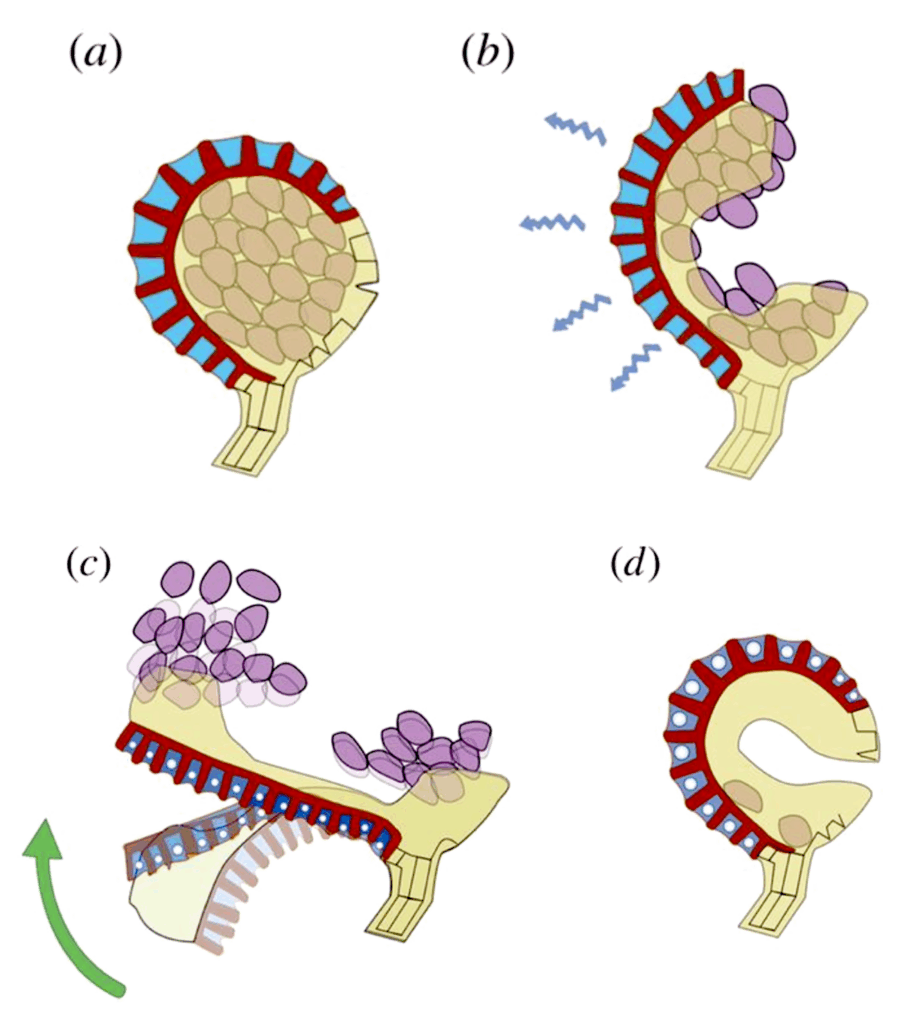
In many ferns, sporangia are far more dynamic than their name suggests. They don’t merely open; they don’t even split suddenly. Instead, they function as catapults, launching spores at speeds of up to 10 meters per second! (Llorens et al. 2015).

The diagram below illustrates a sporangium catapult in action. Notice the row of blue, water-filled cells (a). As the outer surface of this row dries, it curves backward, opening the sporangium and “cocking” the catapult (b). This process builds up elastic pressure until, in just 30 microseconds, the row collapses, propelling the spores through the air (c).
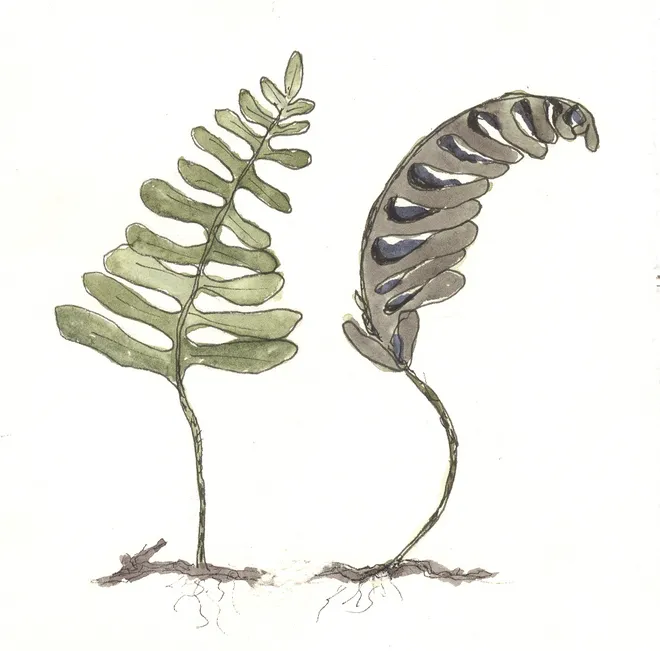
Fern spores are as fine as dust and can travel vast distances. A fortunate spore that lands in the right location will germinate to produce not a fern plant, but a small, rootless, stemless, and leafless structure called a prothallus. The purpose of this? Sexual reproduction! The prothallus is a gametophyte, responsible for producing gametes (sperm and eggs), where fern fertilization occurs.

A fern gametophyte is a simple structure, resembling a tiny piece of green lettuce when viewed from above. Beneath its surface, hair-like rhizoids anchor it in place, and it houses crucial structures, the antheridia and archegonia, which produce sperm and eggs, respectively.
When water is present, sperm are released and swim in search of a mate. With luck, one will reach an archegonium, either on the same gametophyte or on a neighboring one. It travels down the “neck” of the archegonium and fertilizes the egg cell at the base. This fertilization produces a zygote, which grows into the first leaves of the sporophyte as the gametophyte disintegrates. The sporophyte continues its development into the familiar spore-producing fern, and the cycle repeats.
It took considerable time for botanists to accept that ferns do not produce seeds. Even the renowned botanist Carl Linnaeus was convinced that fern seeds existed, though he was unsure of their origin. In 1737, he confessed, “I must confess my ignorance whether what I see [today’s spores] is seed, or dust of the anthers [pollen].” By 1751, he had concluded that the dust was, in fact, the minuscule seeds of ferns.
It was not until the mid-1800s that the myth of fern seeds was finally dispelled. For a time, humans believed in the magical properties of fern seeds. “We have the receipt of fern-seed, we walk invisible,” declared one of Falstaff’s band of thieves. Robbin Moran’s book begins with this Shakespearean reference to fern seeds—but no spoilers here! You’ll need to read it yourself.
How to Grow Ferns from Spores
Ferns are remarkably simple to cultivate from spores. Although the process may take several years, the outcome is highly rewarding, offering an abundant supply of ferns without cost. Follow the steps below to embark on this fascinating journey.
Basic Biology of Fern Reproduction
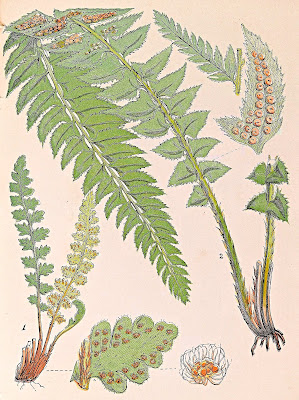
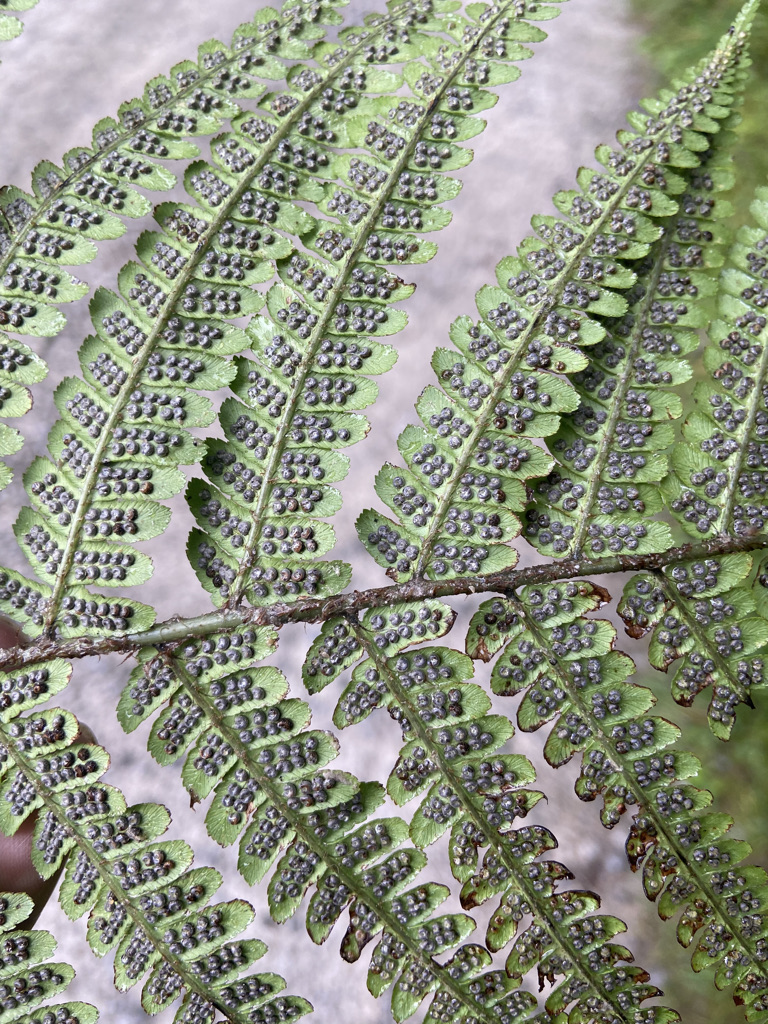
Ferns, some of the most ancient plants on Earth, have a unique reproductive method. Unlike flowering plants that produce seeds, fern reproduction is both primitive and intriguing. Spores, the reproductive units of ferns, form on the underside of the fern’s fronds in structures known as sori (plural) or sorus (singular).
The arrangement of sori beneath the fronds is a key feature in identifying fern species. Each species has a distinct pattern, much like a fingerprint, allowing easy identification in field guides.
Inside each sorus, sporangia house the spores. These spores are single cells that play a crucial role in the fern life cycle, which is particularly remarkable as ferns exhibit two distinct plant forms. This duality is akin to the metamorphosis of a caterpillar into a butterfly.
A spore germinates into the first stage of the fern’s life cycle, known as the prothallus (singular) or prothalli (plural). Resembling a small green scale, it can be mistaken for moss or algae but is easily distinguished by its solid structure, akin to a small leaf anchored to soil or decaying wood. The prothallus represents the gametophyte stage of the fern’s life cycle—the sexual phase.
This stage is particularly fascinating, as within a year, the prothallus develops noticeable round depressions that house both eggs and sperm. Fern sperm, unlike animal sperm, swim in water to fertilize the eggs on other prothalli. This mode of reproduction is an extraordinary feature of ferns.
Upon fertilization, the egg and sperm merge to form a zygote, which then grows into the sporophyte—the familiar, fully-grown fern we recognize, with fronds that will eventually produce spores.
This life cycle mirrors the early stages of seed-producing plants, showcasing an evolutionary transition from ferns to more advanced flora. The parallels with animal reproduction are equally fascinating.
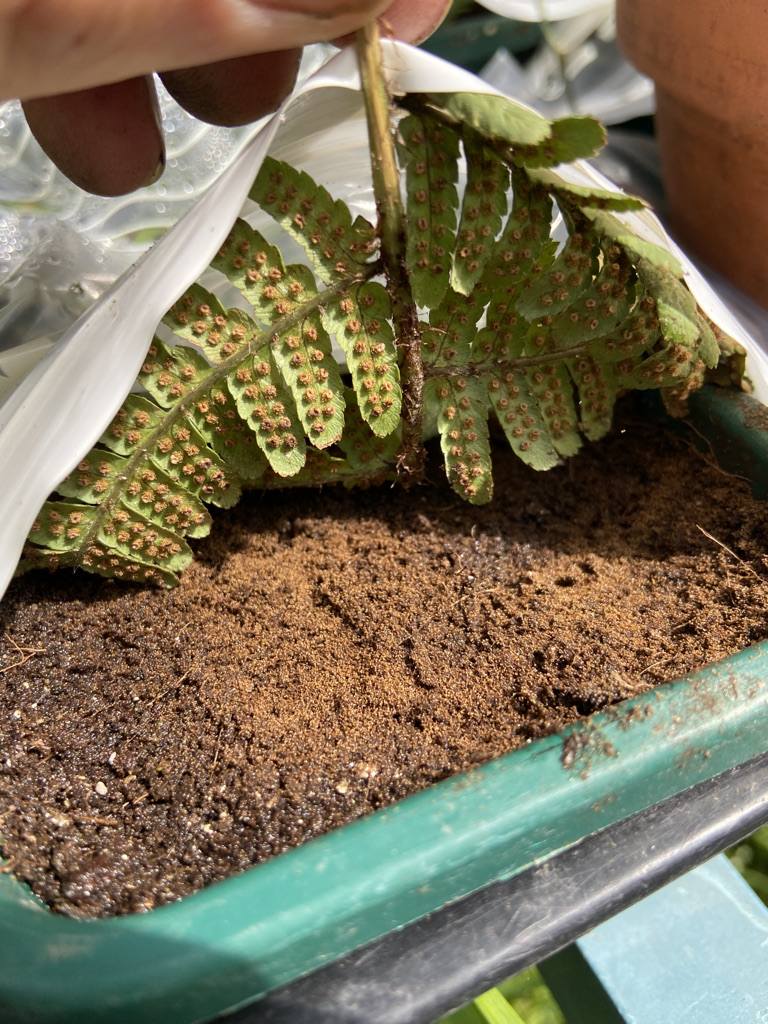
STEP ONE: Collect Spores
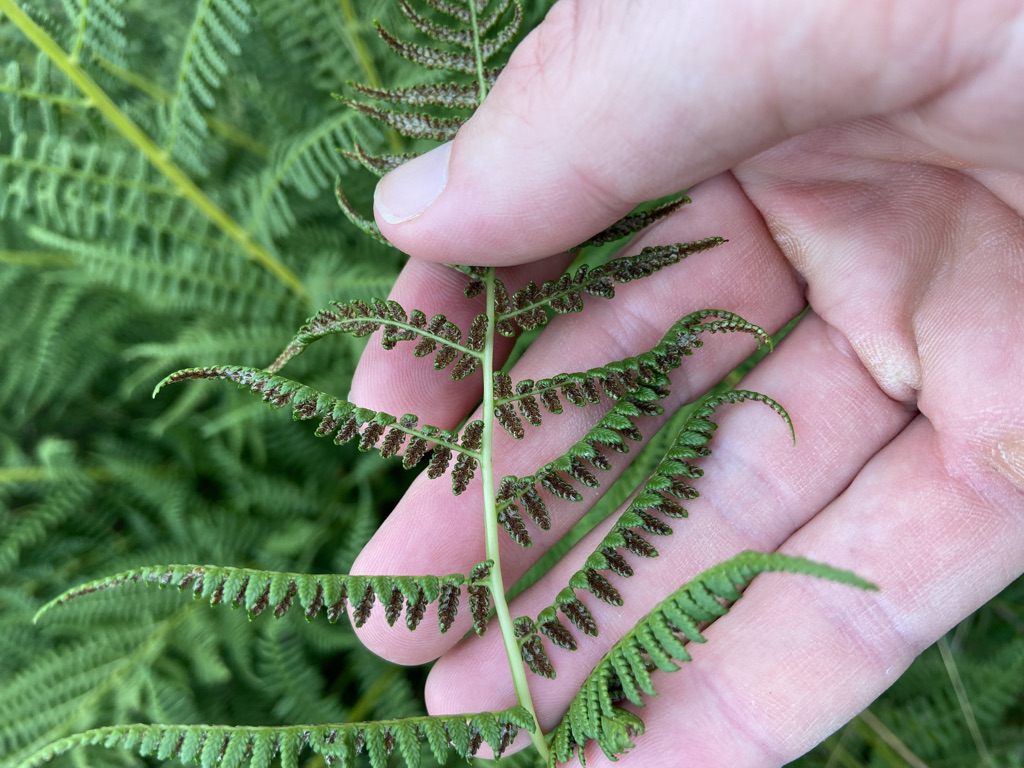
Ferns release spores at various times of the year, typically towards the end of summer. You can easily identify when they are ready by observing the presence of brown, yellow, or orange dust around the sori. This dusty substance contains the spores, which you can collect by gently pinching it between your fingers. If the sori appear compact without any visible spore dust, they are not yet mature.
STEP TWO: Sprinkle Spores onto Damp Compost
I use a peat-free compost, spreading it to a depth of 1–2 cm in small seed trays. The amount of compost needed is minimal at this stage. Water the compost from below before adding the spores to prevent them from being washed away. For convenience, I place small pieces of fern fronds, spore-side down, over the compost, though this step is not necessary. Be cautious, as doing so may result in an excess of spores in the tray, as I discovered during my sowing in late-summer 2021.
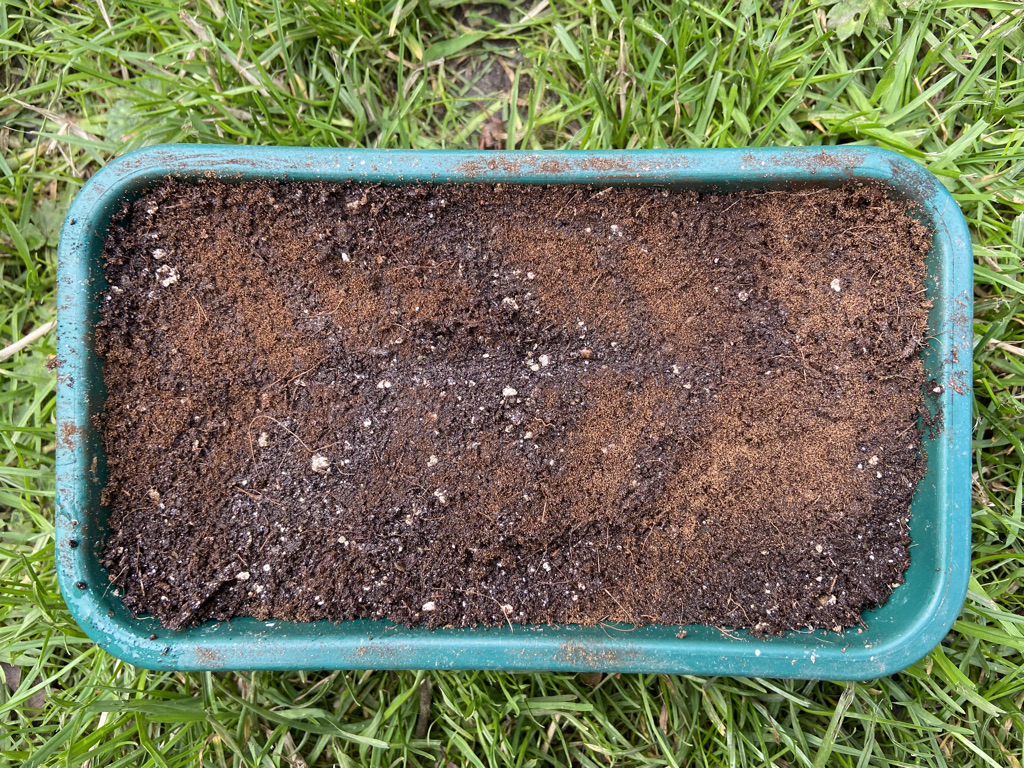
STEP THREE: Keep Covered and Place in a Shady Location
Cover the trays to retain moisture and to protect the spores from contamination by spores of other fern species. Position the trays in a cool, shady area, out of direct sunlight. Ensure that the compost does not dry out.
STEP FOUR: Leave to Grow
After several days, I noticed that the spores had settled onto the compost, prompting me to remove the leaves. I kept the trays covered and left them in their cool, shaded location for a few weeks. For more tender ferns, keep them in a warmer spot, but the process remains the same.
STEP FIVE: Signs of Life!
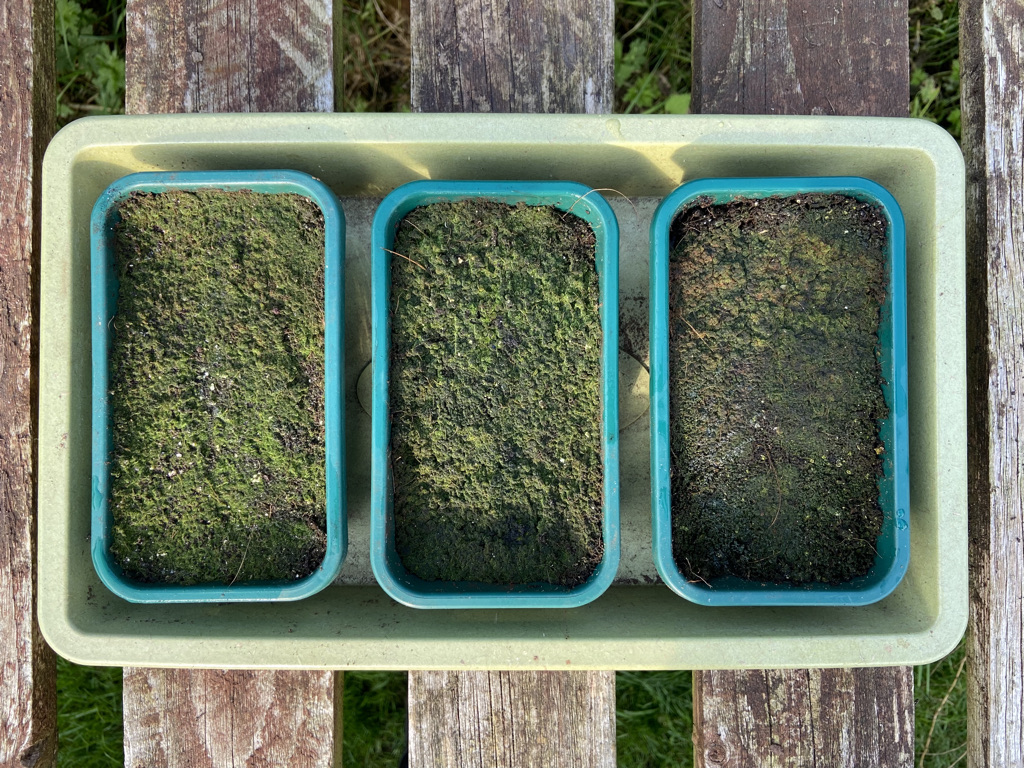
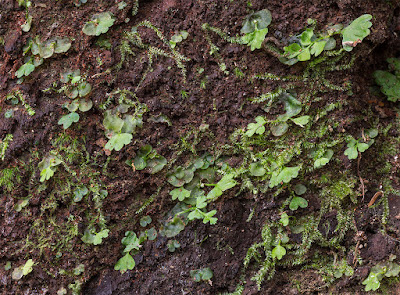
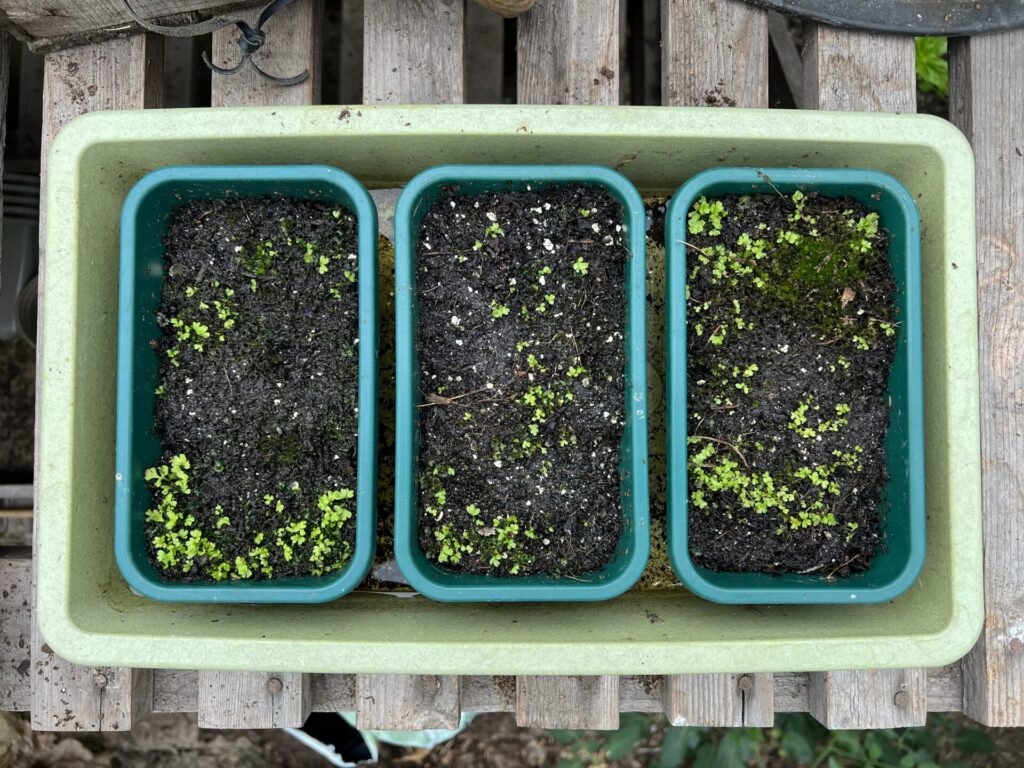
Different fern species take varying amounts of time to germinate, but within a few weeks, I noticed a fine, green, moss-like layer beginning to form. This marks the beginning of the prothallus stage. I continued to keep the trays covered and placed them in a shaded area outdoors until spring. (I sowed the spores in late August in the UK.)
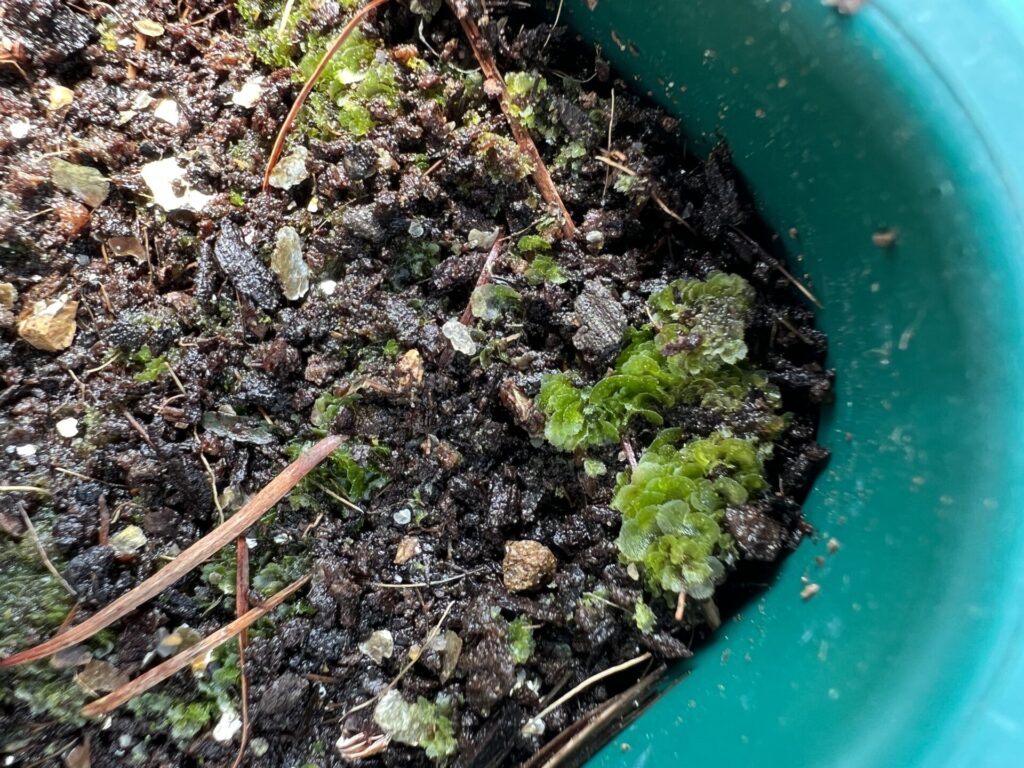
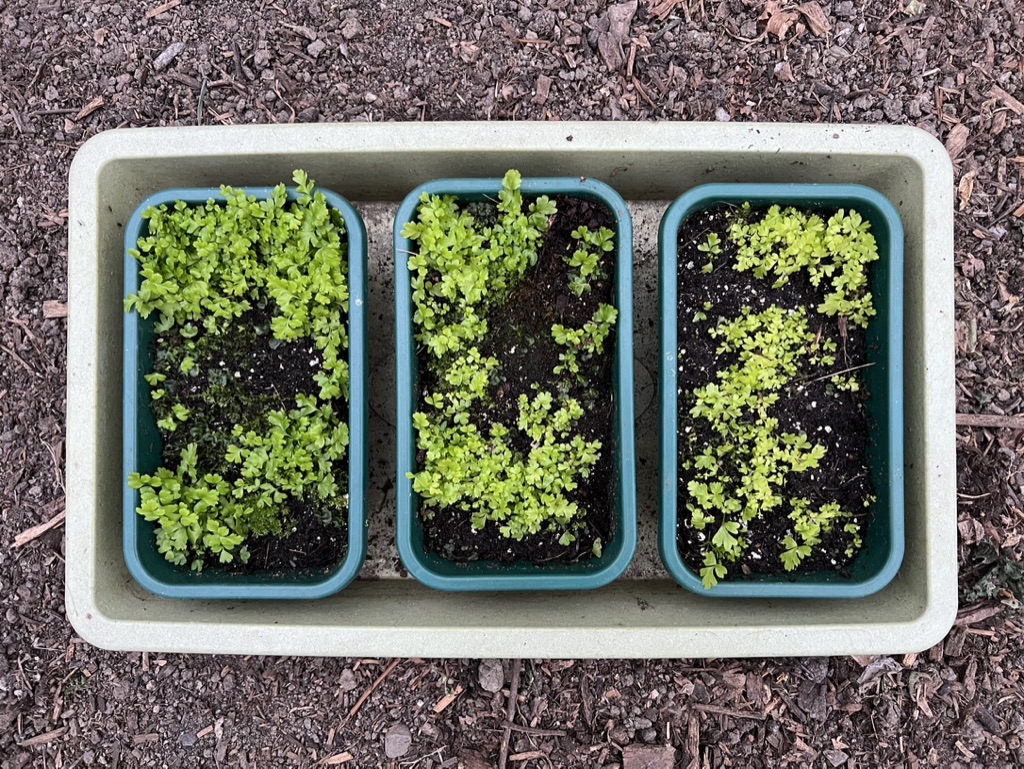
Over time, this moss-like covering develops into flat green structures known as prothalli. These represent the gametophyte generation of the fern lifecycle. The prothallus photosynthesizes, develops roots, and produces both male and female sex organs. However, it does not produce spores. The male organs generate sperm, which swim through water to fertilize the female organs on other prothalli. The successful fertilization of an egg forms a zygote, which develops into the larger, spore-producing sporophyte we recognize as a fern.
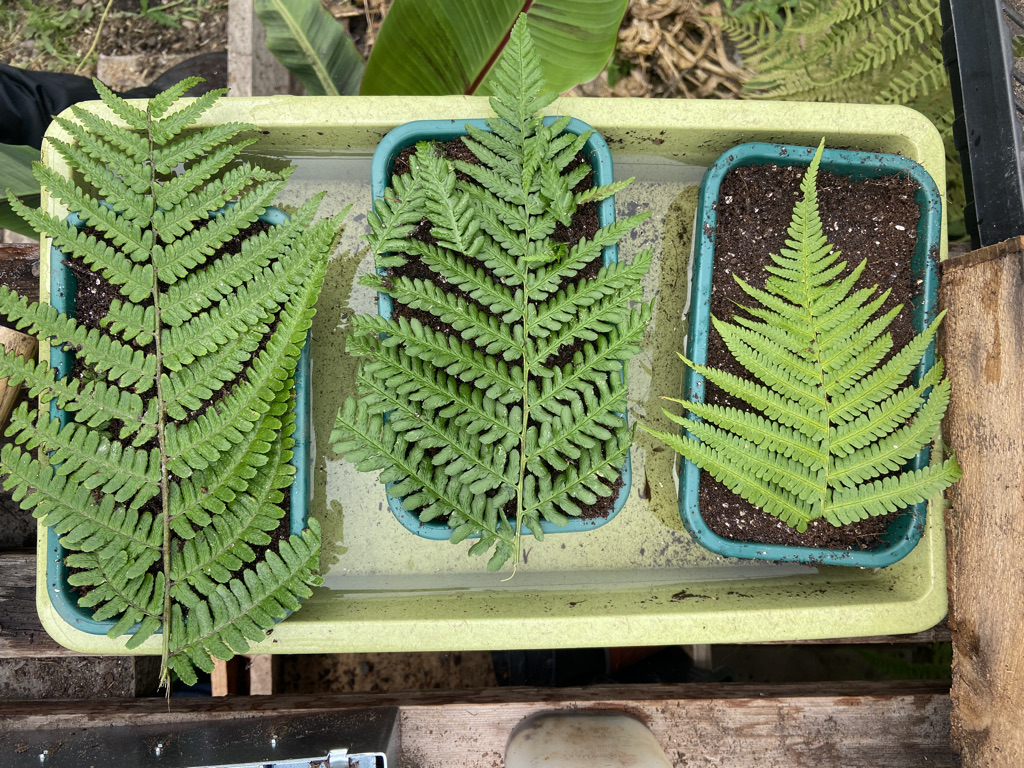
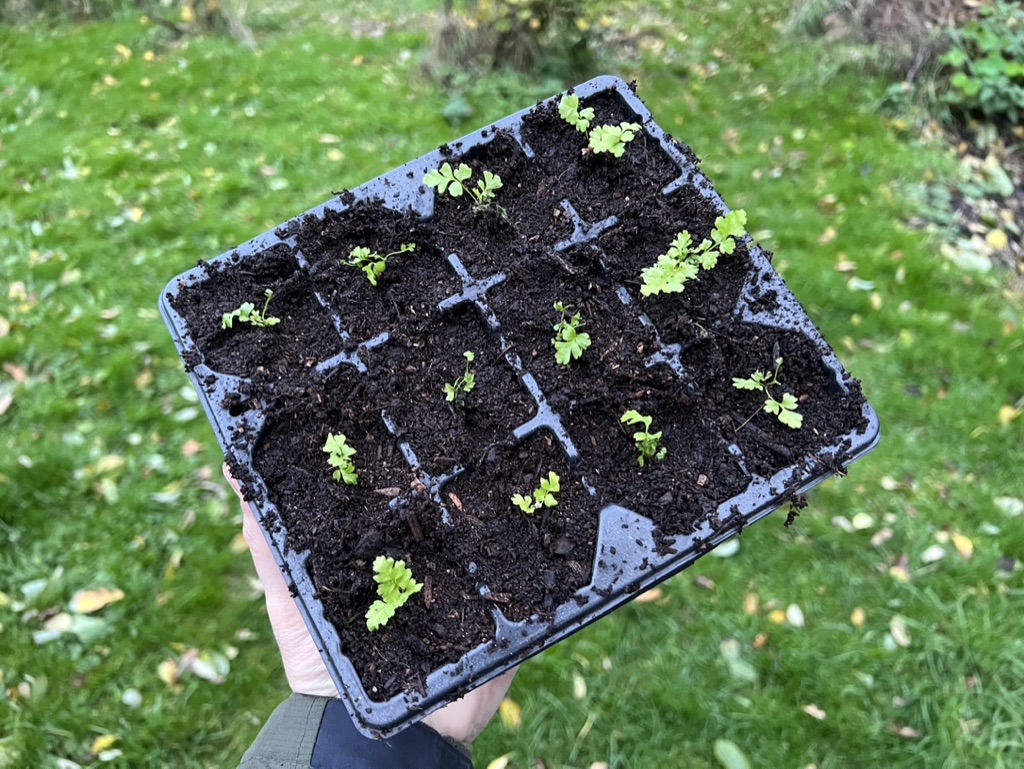
STEP SIX: Transplanting into Individual Pots
Once the young ferns have fronds the size of a small thumb, typically with two to three leaves, they are robust enough to be transplanted into individual pots of peat-free compost.
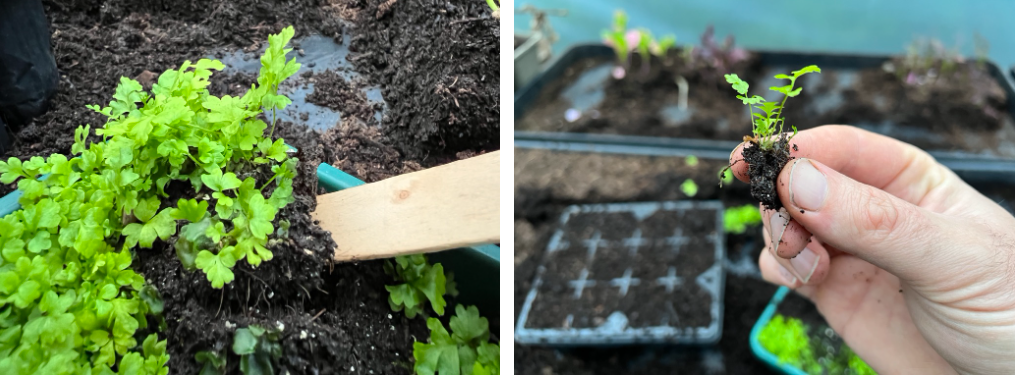
I use a bamboo plant label to gently lift the small ferns, holding the leaves to avoid damaging the fragile roots. I then place the ferns into small holes prepared in pots or seed trays filled with peat-free compost. After transplanting, I thoroughly water the ferns by placing the pots in a tray and watering from below, though a watering can with a fine nozzle would also suffice. Keep the pots in a bright location, but not in direct sunlight, and maintain moisture until the plants develop a healthy number of larger fronds.
STEP SEVEN: Planting Out
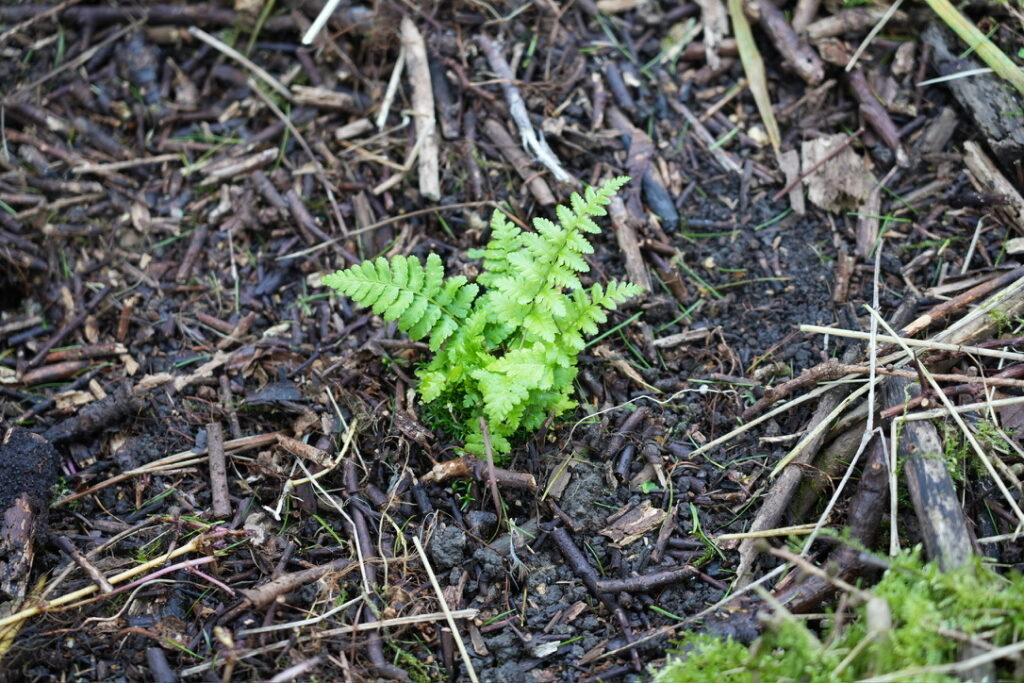
In autumn 2023, two years after sowing the spores, I transplanted my first batch of baby ferns into various parts of the garden. Each fern had a solid crown at the center of healthy fronds. I will provide updates on their progress in the coming years.